
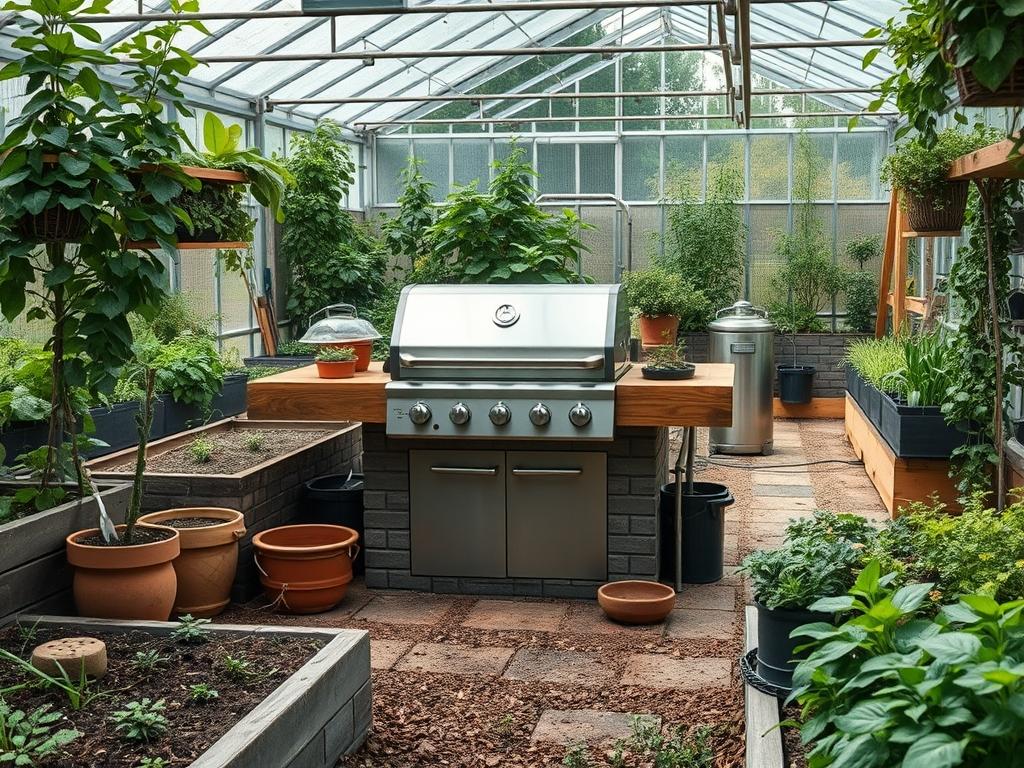
Designing Backyard Outdoor Grill Islands requires a sophisticated synthesis of architectural permanence and horticultural fluidity. As a landscape architect, I view the grill island not merely as an appliance station, but as a structural anchor that dictates the flow of the entire outdoor living room. The primary challenge involves integrating heavy, heat-generating masonry into a living environment where climate, soil stability, and vegetation are in constant flux. A poorly placed island can create “dead zones” in a yard, where air circulation is stifled or foot traffic becomes bottlenecked. Conversely, a strategically positioned island enhances curb appeal and serves as a functional transition between the interior kitchen and the natural world. Success depends on a granular understanding of site-specific microclimates: understanding how wind currents will carry smoke, how the sun will bake the countertop surface at 4:00 PM, and how stormwater runoff will interact with the island’s foundation.
The landscaping surrounding Backyard Outdoor Grill Islands must prioritize both safety and aesthetics. If your region is prone to high winds or seasonal storms, the island must be constructed with materials that offer significant thermal mass and structural wind resistance. Beyond the physical structure, the surrounding topography must be analyzed. Designing for “functionality goals” means the chef should have a clear sightline to social areas without being isolated. We look at the “work triangle” concept, but we expand it to include the transition from the Stainless Steel Grill to the Stone Countertop and then to the nearby Dining Terrace. Every decision, from the choice of Pavers to the placement of a Retaining Wall, should support an ergonomic flow that minimizes the distance between food preparation and the point of service.
Landscape Design Principles
Effective backyard planning starts with symmetry and visual balance. When an island is dropped into a landscape without a clear relationship to the home’s architecture, it looks like an afterthought. We use focal points to draw the eye. A large Outdoor Fireplace or a specimen tree can serve as a secondary anchor that balances the weight of the grill island on the opposite side of the patio. Symmetry does not always mean a mirror image; it can be achieved through “visual weight.” For instance, a heavy Granite Countertop on the left can be balanced by a group of tall Columnar Evergreens on the right.
Elevation layers are critical for preventing a flat, uninteresting backyard. By using Segmental Retaining Walls, we can create raised planters that bring the garden up to the level of the grill island. This serves a dual purpose: it hides the “utility” side of the island and brings aromatic herbs like Rosemary closer to the chef’s nose. Walkways must be wide enough for two people to pass comfortably, typically requiring a minimum of 48 inches in width. These paths should be constructed from non-slip materials like Honed Sandstone or Textured Concrete Pavers.
Irrigation planning is another pillar of professional design. You cannot have a high-heat grill adjacent to a traditional spray-head sprinkler system. The thermal shock can damage the grill’s exterior, and the moisture can cause premature corrosion. We transition to Drip Irrigation lines near the island to deliver water directly to the root zones of surrounding plants without overspraying the cooking equipment. This ensures the landscape stays lush without compromising the longevity of your Outdoor Kitchen Appliances.
Plant and Material Selection
Selecting the right flora and hardscape materials requires balancing heat tolerance with desired growth patterns. Near a grill island, plants must be resilient enough to handle occasional heat blasts and occasional foot traffic.
| Plant Type | Sun Exposure | Soil Needs | Water Demand | Growth Speed | Maintenance Level |
| :— | :— | :— | :— | :— | :— |
| Rosemary | Full Sun | Well-Draining | Low | Fast | Low |
| Lavender | Full Sun | Sandy/Rocky | Low | Medium | Medium |
| Boxwood | Partial Shade | Loamy/Rich | Moderate | Slow | Medium |
| Dwarf Fountain Grass | Full Sun | Adaptable | Moderate | Medium | Low |
| Sky Rocket Juniper | Full Sun | Well-Draining | Low | Fast | Low |
| Creeping Thyme | Full Sun | Poor/Sandy | Low | Medium | Low |
| Mexican Feather Grass | Full Sun | Well-Draining | Very Low | Fast | Low |
For materials, Natural Stone Veneer remains the gold standard for island cladding due to its durability and timeless look. Concrete Countertops are popular for modern designs but require professional sealing to prevent staining from fats and oils. Underneath the feet, Polymeric Sand should be used between pavers to prevent weed growth and stabilize the joints against the vibrations of heavy foot traffic near the cooking station.
Implementation Strategy
The implementation phase begins with a precise site layout using a Transit Level or Laser Level to ensure the area is perfectly graded. Proper grading is the most overlooked step. The ground must slope away from the grill island at a rate of at least 1 inch per 10 feet to prevent water from pooling around the base. Once the site is marked, we begin the excavation for the utility trenches. Gas Lines, Electrical Conduit, and Water Lines must be buried at depths specified by local building codes, usually between 18 and 24 inches.
After the utilities are in place, the foundation is poured. For a large grill island, a 4-inch Reinforced Concrete Slab is the minimum requirement to prevent settling and cracking. Once the masonry is built, we focus on the transition to the garden. This involves laying down a high-quality Geotextile Fabric to suppress weeds before applying the Hardscape Edging.
For the softscape areas, we recommend a 3-inch layer of Hardwood Mulch to retain moisture and regulate soil temperature. Drainage is managed through a combination of French Drains and Catch Basins integrated into the patio design. If the island is situated at the base of a slope, a Dry Creek Bed made of River Rock can be used to divert water around the structure, turning a potential drainage problem into a beautiful landscape feature.
Common Landscaping Failures
The most frequent failure I see in existing Backyard Outdoor Grill Islands is poor drainage management. When water gets trapped behind a grill island or under a patio, it leads to hydro-static pressure that can shift the entire structure. This results in cracked countertops and cabinet doors that no longer align. Another common mistake is root overcrowding. Homeowners often plant fast-growing species too close to the island without realizing how large the root balls will become. Over time, these roots can lift Pavers and even compromise the island’s concrete pad.
Soil compaction is another silent killer of backyard landscapes. During the construction of the grill island, heavy machinery and frequent foot traffic compress the soil, squeezing out oxygen and making it impossible for plants to thrive. We mitigate this by using an Auger to loosen the soil in planting beds and adding Organic Compost to restore soil structure. Finally, improper spacing between the grill and flammable vegetation is a major safety risk. There should be at least a 36-inch clearance between the back of the grill and any ornamental grasses or woody shrubs.
Seasonal Maintenance
Landscape management is a year-round commitment. In the spring, the focus is on the Irrigation System. We check for blocked emitters and recalibrate the timers for the upcoming growing season. This is also the time to apply a Pre-emergent Herbicide to prevent weed seeds from germinating in the paver joints.
Summer maintenance involves monitoring the “stress levels” of the plants near the grill. The reflection of heat from Stainless Steel and masonry can create a localized desert environment. Increased watering may be necessary for plants in the immediate vicinity of the island.
Autumn is the season for debris management. Leaves and organic litter must be cleared away from the grill’s air intake vents and drainage grates to prevent clogs. We also recommend applying a fresh layer of Bark Mulch to protect roots from the upcoming frost.
In the winter, the priority shifts to protection. In colder climates, Water Lines must be blown out with compressed air to prevent freezing. If your island features a Natural Stone Countertop, apply a high-quality sealer before the first snow to prevent moisture from entering the pores and causing “spalling” during freeze-thaw cycles.
Professional Landscaping FAQ
Q: What is the best material for a grill island base?
A: Concrete Cinder Blocks reinforced with Rebar and finished with Stone Veneer offer the best longevity. They provide structural integrity, fire resistance, and the ability to withstand extreme weather shifts without warping or rotting like wood frames.
Q: How do I manage smoke around a seated area?
A: Position the grill island based on “prevailing wind” patterns. Ideally, the grill should be downwind of the primary seating area. If winds are unpredictable, a Powerful Vent Hood or a Pergola with Slotted Rafters can help dissipate smoke.
Q: Does an outdoor kitchen need a dedicated drainage system?
A: Yes. If you include a sink, most codes require connection to a Greywater System. For the patio itself, utilize Channel Drains along the perimeter of the island to prevent grease runoff from staining your landscape or polluting the lawn.
Q: Can I put a grill island on an existing deck?
A: It depends on the load-bearing capacity. Standard decks are rarely built for the weight of masonry. You must consult a structural engineer to add Joist Hangers and Support Posts before installing a heavy Grill Island or Pizza Oven.
Q: Which plants are best for privacy around a grill?
A: Emerald Green Arborvitae or Sky Rocket Junipers provide excellent vertical screening. They have a narrow footprint, allowing you to create a “living wall” close to the island without encroaching on the chef’s workspace or the dining area.