
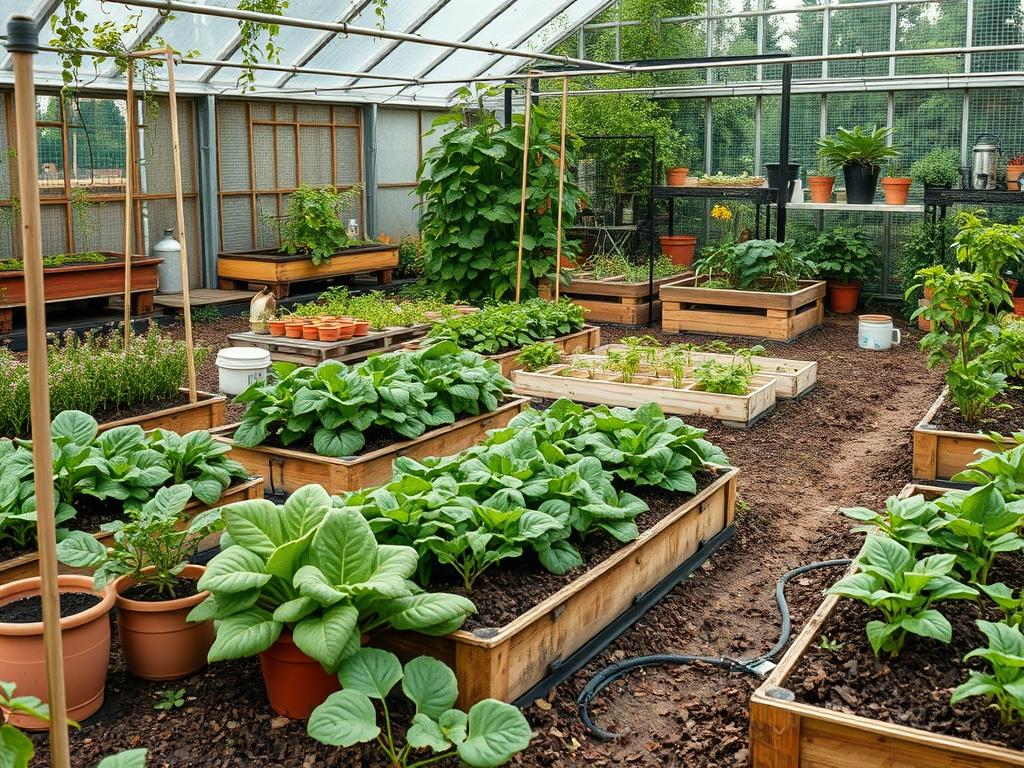
Designing a functional vegetable garden requires more than just dropping seeds into the dirt; it involves a sophisticated understanding of spatial dynamics, security against local wildlife, and aesthetic cohesion. Backyard Caged Vegetable Plots serve as the primary solution to the persistent battle between the gardener and the surrounding environment. These structures must protect the harvest from deer, rabbits, and squirrels while remaining a focal point of beauty rather than a utilitarian eyesore. A successful design considers the prevailing winds, the arc of the sun, and the transit paths of the family. When we approach this as a landscape architecture project, we transform a simple garden into a permanent outdoor room that enhances property value and provides a sustainable food source.
The landscaping challenge often lies in the balance between security and accessibility. A cage must be robust enough to withstand structural loads and animal persistence, yet it must allow the gardener to work without feeling cramped. We must also consider the climate of the region. High wind areas require reinforced corner posts, while humid environments demand maximum airflow to prevent fungal pathogens from destroying the crop. By integrating these plots into the broader landscape plan, we ensure that the garden feels like a deliberate choice rather than a cluttered afterthought. Proper site selection is the first step, focusing on areas that receive at least six to eight hours of direct sunlight while avoiding low spots where frost and water tend to settle.
Landscape Design Principles
Symmetry and visual balance are the hallmarks of a professional outdoor space. When planning Backyard Caged Vegetable Plots, the use of geometric shapes, such as rectangles or L-shaped configurations, helps define the garden as a formal element. We often use the “Rule of Thirds” to place the garden within the view from the primary living areas of the home. This ensures that the structure complements the home’s architecture. Visual sightlines should be kept clear, meaning the height of the cages should be proportional to the surrounding fences and foliage.
Elevation layers add a professional touch to any garden design. By using retaining walls or built-in planters of varying heights, you create a sense of depth. For example, placing lower cages in the foreground and taller structures in the background creates an amphitheater effect that allows for easier harvesting and better sun penetration. Irrigation planning must be integrated into the design phase rather than added later. We recommend sub-surface drip irrigation systems that target the root zone directly, reducing evaporation and keeping the foliage dry.
Walkways are another critical design element. A common mistake is making paths too narrow. For a functional workspace, walkways should be at least 36 inches wide to accommodate a wheelbarrow or garden cart comfortably. Materials like crushed granite, pea gravel, or flagstone provide a stable, permeable surface that prevents mud and defines the boundaries of the growing area. These materials also offer a color contrast to the green of the plants, further emphasizing the design’s cleanliness.
Plant and Material Selection
Choosing the right materials for the cage and the plants to grow within them is vital for long-term success. The following table provides a guide for common selections in a secured backyard environment.
| Plant Type | Sun Exposure | Soil Needs | Water Demand | Growth Speed | Maintenance |
| :— | :— | :— | :— | :— | :— |
| Heirloom Tomatoes | Full Sun | Well-drained Loam | High | Fast | High |
| Bell Peppers | Full Sun | Organic-Rich | Moderate | Medium | Medium |
| Kale | Partial to Full Sun | Nitrogen-Rich | Moderate | Fast | Low |
| Bush Beans | Full Sun | Sandy Loam | Moderate | Fast | Low |
| Culinary Herbs | Full Sun | Well-drained | Low | Medium | Low |
| Marigolds | Full Sun | Average | Low | Medium | Low |
For the structure itself, we prefer 4×4 cedar posts or redwood because of their natural resistance to rot and insects. The mesh should be 1/2-inch hardware cloth for the lower sections to prevent rodents from squeezing through, while the upper sections can utilize poultry netting or welded wire fencing. Using stainless steel fasteners will prevent rust streaks from marring the wood over time.
Implementation Strategy
The implementation of Backyard Caged Vegetable Plots begins with site grading. A level site is easier to build on and prevents uneven water distribution. Use a laser level or a long spirit level to ensure the ground is flat. If the yard has a significant slope, consider building a retaining wall to create a level terrace. Once the site is prepared, the layout is marked using surveyor’s stakes and string lines to ensure perfectly square corners.
Excavation for the posts should reach below the frost line, typically 24 inches to 36 inches depending on your local building code. Once the posts are set in concrete or compacted gravel, the framing for the raised beds can begin. We recommend a bed height of 18 inches to reduce strain on the back during maintenance. The interior of the beds should be lined with a heavy-duty landscape fabric or a Gopher wire base to prevent subterranean pests from entering.
After the structure is built, the soil is amended with compost and vermiculite to ensure proper drainage and nutrient availability. Edging the perimeter of the cages with steel edging or paving stones creates a clean break between the garden and the lawn. Finally, apply a 3-inch layer of hardwood mulch or pine straw to the surface of the soil to regulate temperature and retain moisture. This mulch also provides a finished, professional look to the entire installation.
Common Landscaping Failures
One of the most frequent failures in backyard garden design is poor drainage. If the soil becomes waterlogged, the roots will suffer from hypoxia, leading to root rot. This often happens when gardeners fail to account for the “bathtub effect” in clay-heavy soils. To fix this, always ensure the base of your raised bed is permeable or install a French drain system to carry excess water away from the structure.
Soil compaction is another silent killer of vegetable plots. This occurs when people step inside the growing area or use heavy machinery too close to the beds. Once the soil is compacted, air and water cannot reach the roots. To prevent this, design the beds so that every square inch can be reached from the walkways without stepping into the soil.
Improper spacing is a third common mistake. While it is tempting to pack in as many plants as possible, overcrowding reduces air circulation and encourages pests. For example, Tomato plants need at least 24 inches of space between them. Without this gap, the cage becomes a humid trap for blight and mildew. Similarly, failing to plan for the mature height of the plants can result in them growing through the top of the cage, making them vulnerable to the very birds and deer you were trying to exclude.
Seasonal Maintenance
Seasonal management ensures the longevity of both the crops and the structure. In the Spring, the focus is on soil preparation and structural inspection. Check for any wood rot or loose mesh that may have occurred during the winter. This is the time to integrate fresh organic compost into the top 6 inches of soil and test the pH levels.
Summer maintenance is dominated by irrigation management and pruning. During extreme heat, even the best-designed Backyard Caged Vegetable Plots can suffer. Ensure the drip system is functioning properly and that the mulch depth is maintained to keep roots cool. Prune any foliage that touches the cage walls to maintain airflow.
Autumn is the time for sanitation. Remove all spent vegetable plants to prevent diseases from overwintering in the soil. This is also a great time to apply a protective sealant to the wooden posts of the cage. If you are in a cold climate, consider wrapping the lower portion of the cage in burlap to protect the structure from heavy snow accumulation.
Winter is the season for planning and structural repairs. If the cage has a removable top, take it down to prevent snow load from collapsing the frame. Inspect the hardware cloth for any signs of gnawing or rust. If the soil is not being used for a winter crop, cover it with cardboard or a heavy tarp to prevent nutrient leaching from winter rains.
Professional Landscaping FAQ
How deep should the posts for the cage be buried?
Posts should be buried at least 24 inches deep. In colder climates, go below the frost line to prevent the structure from heaving. This provides the necessary stability for heavy wire mesh and wind resistance.
What is the best material for the cage mesh?
Hardware cloth with a 1/2-inch grid is ideal. It is strong enough to stop large predators like deer and small enough to exclude mice and voles. It is more durable than plastic netting or hexagonal poultry wire.
Can I use pressure-treated lumber for vegetable cages?
Modern pressure-treated lumber is generally safe, but many professionals prefer cedar or redwood. These species are naturally rot-resistant and contain no chemical additives, making them the gold standard for organic food production environments.
How do I prevent weeds from growing in the garden walkways?
Lay down a commercial-grade weed barrier before adding your path material. Covering the fabric with 3 inches of crushed stone or mulch will suppress weed seeds and provide a clean, dry surface for walking.
How often should I replace the soil in the caged plots?
You do not need to replace the soil entirely. Instead, add 2 to 4 inches of fresh compost every year. Rotating your crops annually also prevents the build-up of soil-borne diseases and ensures nutrient balance within the beds.