
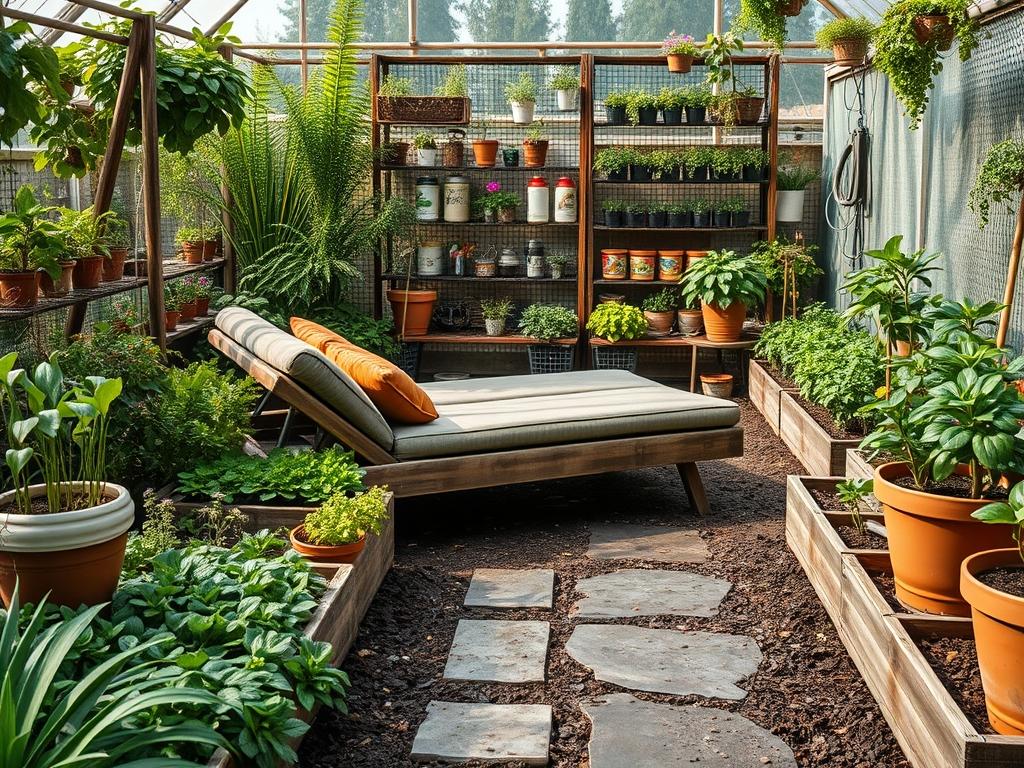
Designing a backyard retreat requires a sophisticated understanding of spatial flow, microclimates, and the psychological impact of structured greenery. When we approach Backyard Sun Lounger Styling from a landscape architecture perspective, we move beyond simple furniture placement. We are creating a destination within the property that balances exposure to the sun with the necessity of cooling breezes and visual privacy. The challenge lies in integrating these functional requirements into the existing topography of the site. A poorly planned lounging area often suffers from wind tunnels, excessive glare, or a lack of intimacy, which diminishes the overall curb appeal and utility of the home. Professional garden design ensures that the lounger acts as a focal point, anchored by structural elements like Retaining Walls or established perimeter plantings.
The transition from the home to the lounging zone must feel intentional. This is achieved through the careful selection of hardscape materials that mitigate heat absorption while providing a stable, level surface. In warmer regions, the choice of stone or decking can affect the ambient temperature of the seating area by several degrees. Furthermore, the orientation of the loungers must account for the sun’s trajectory throughout the day, ensuring that users can enjoy the warmth of the afternoon light without being blinded by low-angle glare. By treating the sun lounger as an integral part of the landscape rather than an after-thought, we create a cohesive outdoor environment that increases property value and provides a true sanctuary for the occupant.
Landscape Design Principles
Successful Backyard Sun Lounger Styling relies on the core principles of symmetry and visual balance. In a professional layout, symmetry often dictates the placement of dual loungers, creating a mirroring effect that provides a sense of calm and order. This is frequently reinforced by flanking the furniture with identical Terracotta Planters or structural shrubs. If the design leans toward a modern, asymmetrical look, balance is achieved using massing. For instance, a single heavy lounger might be balanced by a cluster of lighter Ornamental Grasses or a small water feature.
Elevation layers play a critical role in defining the lounging space. By elevating the sun deck by just 6 inches or creating a sunken gravel pit for the loungers, you establish clear boundaries without the need for vertical walls. This use of “rooms” within the garden allows the lounger to feel tucked away and private. Access is another vital consideration. Walkways should be constructed from Flagstone, Decomposed Granite, or Pavers, with a minimum width of 36 inches to allow for comfortable movement. These paths should lead the eye directly to the lounging zone, reinforcing its status as a primary focal point.
Irrigation planning is frequently overlooked in the styling process. It is essential to ensure that Drip Irrigation lines are routed around the lounging area rather than through it to avoid surface dampness or accidental spray on the furniture. Finally, consider the background. Every lounging area needs a “back” to feel secure. This can be a Hedge, a Living Wall, or a well-placed Trellis. This vertical element provides a sense of enclosure and protects the user from prevailing winds, enhancing the comfort of the space.
Plant and Material Selection
Selecting the right biological and mineral components is essential for a low-maintenance, high-impact lounging area. The following table outlines the best selections for a typical sun-drenched backyard environment.
| Plant Type | Sun Exposure | Soil Needs | Water Demand | Growth Speed | Maintenance Level |
| :— | :— | :— | :— | :— | :— |
| English Lavender | Full Sun | Well-drained, sandy | Low | Medium | Light Pruning |
| Blue Oat Grass | Full Sun | Poor to average | Low | Moderate | Low |
| Japanese Boxwood | Part Shade/Sun | Rich, loamy | Moderate | Slow | High (Shearing) |
| Creeping Thyme | Full Sun | Gritty, lean | Low | Fast | Minimal |
| Dwarf Olive Tree | Full Sun | Rocky, dry | Very Low | Slow | Annual Thinning |
| Mexican Feather Grass | Full Sun | Any well-drained | Very Low | Fast | High (Self-seeds) |
For materials, use Polymeric Sand between pavers to prevent weed growth and stabilize the surface. If using natural stone, select Travertine or Light Limestone because these materials remain cool to the touch even in direct sunlight. For mulch, a 3-inch layer of Cedar Bark or Fine Pine Bark helps retain soil moisture around perimeter plants while providing a clean, professional finish that contrasts beautifully with many lounger fabrics.
Implementation Strategy
The implementation phase begins with professional grading. The ground must have a 2 percent slope away from the home and the lounging pad to prevent water from pooling under the furniture. Poor drainage will quickly lead to the degradation of wooden loungers and the growth of mildew on outdoor cushions. Once the grade is established, the site should be cleared of all debris and compacted using a Plate Compactor.
The next step involves installing the hardscape base. If you are using gravel or stone, lay down a Heavy-duty Geotextile Fabric to separate the soil from the stone layer. This prevents the materials from mixing and reduces maintenance requirements over time. For the lounging surface, aim for a clear area of at least 8 feet by 10 feet for a pair of loungers; this allows for side tables and adequate circulation space.
Edging is the hallmark of a professional installation. Use Steel Edging or Aluminum Landscape Edging to create sharp, crisp lines between the lounging area and the surrounding turf or flower beds. This prevents the grass from encroaching on the seating area and keeps the mulch or gravel contained. When planting, ensure that the root balls of your chosen species are at the correct depth; the flare of the trunk should be just above the soil line to prevent rot. Finish the installation by applying a consistent layer of mulch, ensuring it is kept a few inches away from the stems of the plants to encourage air circulation.
Common Landscaping Failures
The most frequent mistake in Backyard Sun Lounger Styling is improper spacing. Homeowners often place loungers too close to swimming pools or irrigation heads, resulting in a constant battle with moisture. Another common error is failing to account for the mature size of surrounding plants. A small Leyland Cypress may look perfect today, but in five years, its root system can heave nearby pavers and its canopy will completely shade the sun-lounging area you worked so hard to create.
Soil compaction is another silent killer of backyard aesthetics. During the construction of the lounge area, high foot traffic or heavy machinery can crush the soil structure, leading to drainage failures and the death of nearby trees. Always use Plywood Sheets to protect the ground if moving heavy materials into the backyard. Additionally, ignore the “heat island” effect at your peril. Surrounding a lounger with dark grey volcanic rock or black metal screens can raise the local temperature to uncomfortable levels, rendering the space unusable during peak summer hours.
Seasonal Maintenance
In the Spring, the focus is on rejuvenation. Inspect all hardscaping for shifting that may have occurred during winter thaws. Re-apply Polymeric Sand to joints if necessary. This is also the time to apply a Prilled Fertilizer to the surrounding garden beds and to check the Irrigation Controller for proper scheduling as the temperatures rise.
Summer maintenance is primarily about hydration and aesthetics. Deadhead spent blooms on plants like Lavender or Salvia to encourage a second flush of flowers near your seating area. Monitor the moisture levels of the soil; plants near stone surfaces will dry out faster due to reflected heat. Wash down the loungers and any stone surfaces with a Low-pressure Power Washer to remove pollen and dust.
As Autumn arrives, focus on cleanup and preparation for dormancy. Cut back Ornamental Grasses only after they have turned a beautiful golden brown to enjoy their winter silhouette. Clear fallen leaves from the lounging area and underlying gravel to prevent organic staining. This is also the ideal time to plant new perennials or shrubs, as the soil is warm but the air is cool.
Winter is the season for protection. If your climate experiences freezing temperatures, shut down the External Water Supply and blow out the irrigation lines. Cover or store wooden loungers in a dry area. For the landscape itself, ensure that a fresh layer of Bark Mulch is present to insulate the roots of your delicate perennials from the freeze-thaw cycle.
Professional Landscaping FAQ
How much space do I need for two loungers?
A minimum area of 80 square feet is recommended. This provides sufficient room for two standard loungers, a shared side table, and a 36-inch clear walking path around the perimeter for safe and comfortable access.
What is the best material for a lounger base?
Permeable Pavers or Light-colored Travertine are ideal. These materials allow water to drain away from the furniture while reflecting sunlight, keeping the surface much cooler for bare feet compared to darker materials like slate or concrete.
How do I prevent my loungers from sinking into the grass?
Install a dedicated Hardscape Pad. Using Crushed Limestone or Decomposed Granite over a compacted sub-base provides a stable, level surface that prevents furniture legs from sinking and eliminates the need for trimming grass around the lounger.
Which plants provide the best privacy for a sun deck?
Tall Ornamental Grasses like Karl Foerster or Clumping Bamboo are excellent. They provide vertical screening and create a soothing rustling sound in the wind, enhancing the sensory experience of the lounging area without being overly invasive.
How often should I clean the stone under my loungers?
Monthly rinsing with a Standard Garden Hose is usually sufficient. However, an annual deep clean with a Neutral pH Stone Cleaner is recommended to remove deep-seated dirt, algae, or mineral deposits that can accumulate on porous stone surfaces.