
Vertical landscaping offers a transformative solution for property owners facing limited horizontal footprints or those seeking to soften the rigid surfaces of perimeter boundaries. Backyard wall planter layouts serve as more than just aesthetic additions; they function as micro ecosystems that mitigate heat island effects and provide acoustic buffering against neighborhood noise. A well executed design requires a shift in perspective from traditional ground level gardening to a vertical engineering mindset. Success in this area hinges on the integration of structural integrity, hydraulic efficiency, and horticultural compatibility to ensure the installation thrives across multiple seasons. When planning these layouts, one must consider the sun path, the wind exposure at varying heights, and the weight bearing capacity of the existing masonry or timber structures. Properly implemented vertical planes can turn a flat, uninspiring yard into a multidimensional retreat that boosts property value and enhances the overall outdoor living experience.
Landscape Design Principles for Vertical Layouts
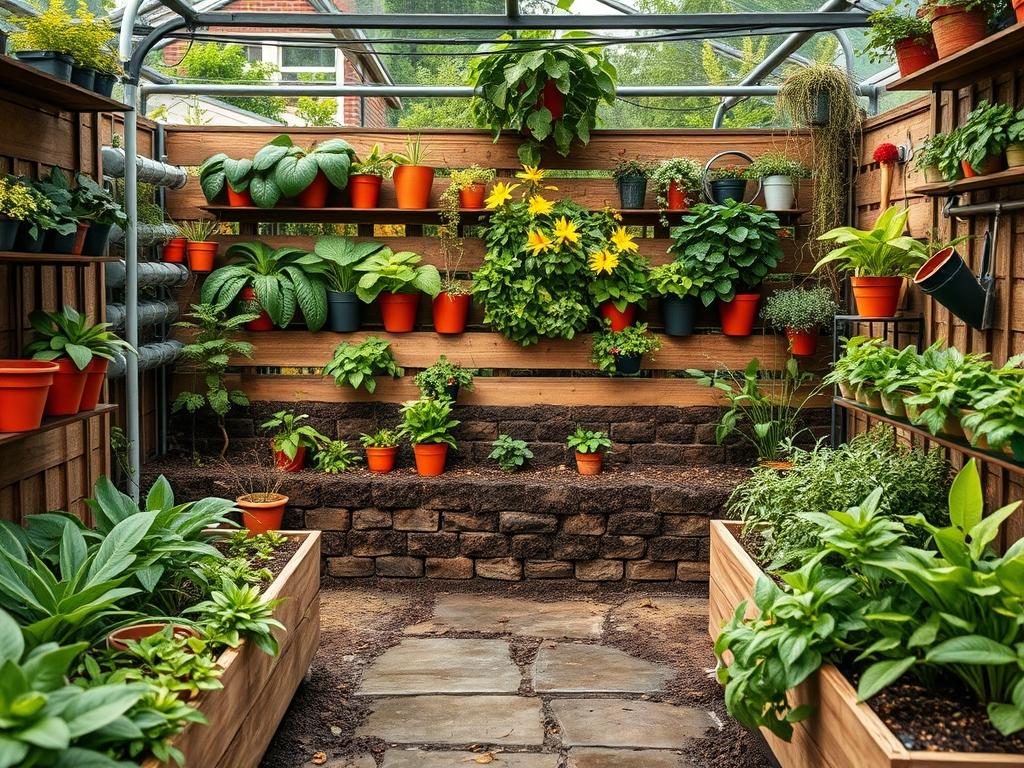
Designing backyard wall planter layouts requires a keen understanding of visual balance and spatial geometry. Symmetry often works best in formal settings where twin columns of planters flank a central focal point, such as a Water Feature or a bespoke Iron Gateway. However, modern aesthetics frequently move toward asymmetrical arrangements that mimic natural cliffside growth. By varying the height and spacing of your wall modules, you create a sense of movement that draws the eye across the landscape. Elevation layers are critical here; placing larger, bolder textures at the bottom and finer, more delicate foliage at the top prevents the installation from feeling top heavy or claustrophobic.
Irrigation planning is perhaps the most technical aspect of the design phase. Unlike traditional garden beds, wall planters lose moisture rapidly due to increased air exposure and gravity. A professional layout should incorporate a Drip Irrigation System with pressure compensating emitters. These systems ensure that the highest planters receive the same volume of water as those at the base. Furthermore, the layout must account for the runoff path. Designing a French Drain or a gravel filled Catch Basin at the foot of the wall prevents water from pooling against the foundation and protects your Hardscaping from erosion.
Walkways and circulation paths should inform the placement of these vertical elements. If a wall planter is situated along a narrow corridor, the foliage should be kept relatively flat to avoid obstructing movement. In contrast, planters located in larger transition zones can accommodate spilling plants that provide a lush, overgrown aesthetic. Always consider the Sightlines from the interior of the home. Large windows should frame the most vibrant sections of the wall, turning the outdoor space into a living wallpaper that changes with the seasons.
Plant and Material Selection
Selecting the right combination of botanical species and structural materials is the foundation of a durable vertical garden. The table below outlines specific plants that excel in wall mounted environments based on their growth habits and environmental needs.
| Plant Type | Sun Exposure | Soil Needs | Water Demand | Growth Speed | Maintenance Level |
| :— | :— | :— | :— | :— | :— |
| Trailing Rosemary | Full Sun | Well Draining | Low | Medium | Low |
| Heuchera (Coral Bells) | Partial Shade | Humus Rich | Moderate | Medium | Medium |
| Sedum (Stonecrop) | Full Sun | Gritty/Sandy | Low | Fast | Low |
| Japanese Painted Fern | Full Shade | Moist/Loamy | High | Slow | Medium |
| English Ivy | Shade to Sun | Adaptive | Moderate | Very Fast | High |
| Silver Falls Dichondra | Full Sun | Well Draining | Moderate | Fast | Low |
For the containers themselves, Powder Coated Aluminum and Corten Steel are preferred for modern layouts due to their longevity and weather resistance. For a more organic appearance, Cedar Wood Planks or Redwood Brackets are excellent choices; however, they require annual sealing to prevent rot. When choosing a mounting substrate, always ensure you are using Stainless Steel Lag Bolts or Masonry Anchors capable of supporting the weight of wet soil, which can be significantly heavier than dry media.
Implementation Strategy
The process begins with a thorough structural audit of the intended wall. If you are attaching planters to a Retaining Wall, verify that the drainage behind the wall is functioning correctly to avoid adding unnecessary hydrostatic pressure. Start by marking your layout using Chalk Lines or Laser Levels to ensure perfectly straight horizontal rows or intentional geometric patterns. Once the grid is established, install the mounting brackets. It is essential to leave a 1 Inch Gap between the planter and the wall surface to allow for air circulation; this prevents moisture from becoming trapped against the wall and causing mold or structural degradation.
Next, focus on the planting media. Standard garden soil is too heavy and lacks the porosity required for vertical containers. Instead, use a high quality Soilless Potting Mix amended with Perlite or Lightweight Expanded Clay Aggregate (LECA). These materials provide the necessary aeration for root systems while keeping the total weight manageable. When placing the plants, ensure the root balls are teased out and settled firmly into the mix to eliminate air pockets.
After the planters are mounted and filled, apply a layer of Organic Mulch such as Coco Coir or Pine Bark Fines. This helps retain moisture and prevents the soil from splashing out during heavy rain. Finally, integrate your Automated Irrigation Controller. Test the system multiple times to ensure there are no leaks at the junctions and that every individual pod is receiving adequate hydration. Adjust the timing based on the orientation of the wall; south facing installations will require significantly more frequent watering than those in northern shadows.
Common Landscaping Failures
One of the most frequent mistakes in backyard wall planter layouts is the neglect of drainage dynamics. When water drains from an upper tier, it often carries silt and tannins that can stain the wall or drown the plants in the lower tiers. To avoid this, each planter should have an independent drainage outlet directed away from the wall surface or into a concealed Collection Tube. Soil compaction is another silent killer. Over time, gravity pulls the fine particles of the soil downward, squeezing out the oxygen that roots need to survive. Using professional grade Vertical Garden Felt or structured cells can help mitigate this settling.
Improper spacing is a common aesthetic and functional failure. Most homeowners plant for the current size of the nursery stock rather than the mature size of the species. Overcrowding leads to poor air circulation, which invites Powdery Mildew and Spider Mites. Furthermore, failing to account for the weight of the water is a dangerous oversight. A single large planter can weigh over 50 Pounds when fully saturated. Without the correct Heavy Duty Anchors, the entire system can fail, causing property damage or injury. Always calculate the maximum wet weight before selecting your hardware.
Seasonal Maintenance
Spring is the season for revitalization. This is the time to prune back any frost damage and refresh the top 2 Inches of soil with Finished Compost. Check all irrigation lines for cracks that may have formed during winter freezes and flush the lines to remove any mineral buildup. As temperatures rise in the summer, monitoring becomes a daily task. High heat can bake the soil in small containers quickly; you may need to adjust your Irrigation Timer to deliver water in short bursts twice a day rather than one long soak.
Autumn requires a shift toward cleanup and protection. Remove any spent annuals and clear away fallen leaves that might trap moisture against the stems of your perennials. This is also the best time to apply a Liquid Seaweed Fertilizer to strengthen root systems before the dormant period. In winter, if you live in a climate prone to hard freezes, you may need to wrap sensitive wall segments in Horticultural Fleece or Burlap. Insulating the planters helps prevent the freeze-thaw cycle from cracking the containers or heaving the plants out of the soil.
Professional Landscaping FAQ
How do I prevent my wall from rotting behind the planters?
Install a Polyethylene Vapor Barrier or maintain a 1 Inch Air Gap between the planter and the wall. This allows moisture to evaporate rather than soaking into the masonry or wood, preventing structural decay and unsightly mold growth.
What is the best way to hide irrigation tubing?
Route your 1/4 Inch Micro Tubing along the seams of the planter boxes or behind the vertical mounting rails. Use U-Shaped Cable Clips to secure the lines, ensuring they follow the natural lines of the layout for a clean finish.
Can I grow vegetables in wall planters?
Yes, provided they receive at least 6 Hours of direct sunlight. Leafy greens like Spinach and Kale excel in vertical layouts. Avoid heavy root vegetables, as they require deeper soil volumes than most wall systems can comfortably provide.
How often should I replace the potting soil?
In a vertical system, you should refresh the top layer annually and perform a full soil replacement every 3 to 5 Years. This prevents the buildup of salts from fertilizers and ensures the media remains porous and nutrient rich.
Is it necessary to use a professional for installation?
While DIY kits exist, a professional ensures the Structural Anchoring and Hydraulic Balance are correct. For large scale layouts or those attached to the primary residence, a consultant can prevent costly water damage and ensure long term plant health.