
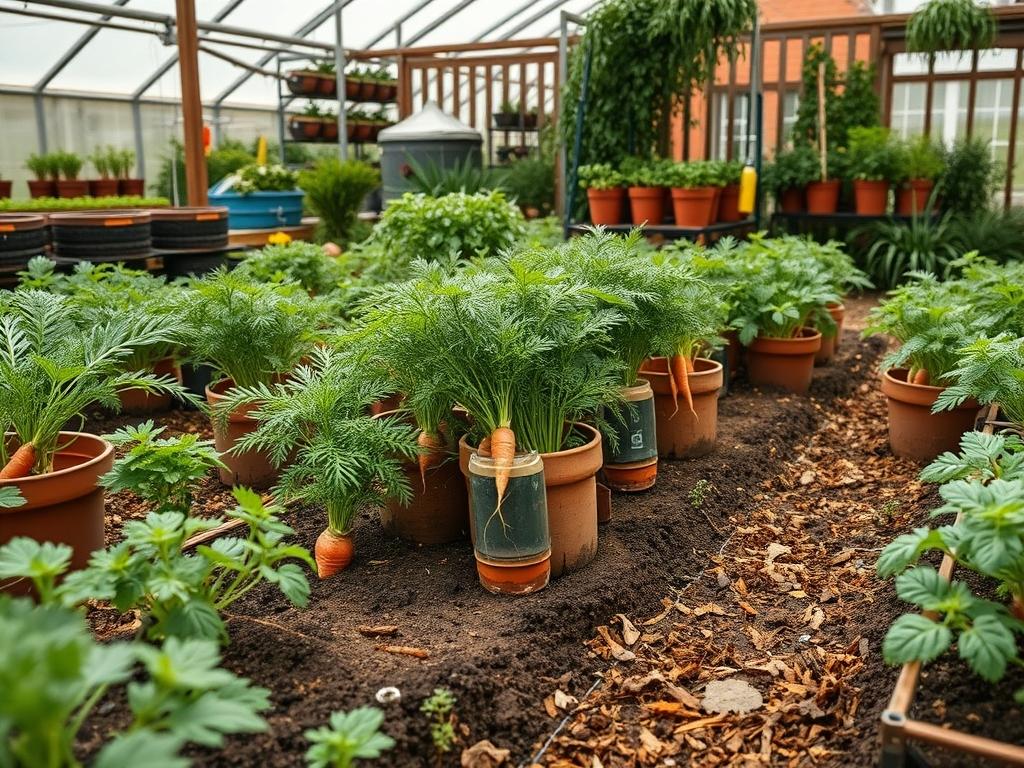
Designing a productive garden within a sophisticated residential landscape requires a balance between horticultural yield and aesthetic discipline. One of the most significant challenges for homeowners involves the cultivation of root vegetables in regions where native soil consists of heavy clay, shale, or compacted urban fill. In these environments, carrots often become stunted or deformed, resulting in disappointing harvests and a cluttered, disorganized garden appearance. The strategic use of Backyard Carrot Growing Tubes offers a refined solution to these structural problems. By elevating the growing medium above the existing grade, these vertical systems provide the necessary depth for long, tap-root development while acting as unique architectural features. From a landscape design perspective, these tubes allow for precise control over drainage and soil composition, ensuring that the visual appeal of the backyard remains intact throughout the growing season.
Integration of these vertical elements into an outdoor living space requires careful consideration of the existing site conditions and microclimates. Most high-yield root crops require a minimum of six to eight hours of direct sunlight, but the heat-absorbent nature of many tube materials can create thermal stress in hotter climates. As an outdoor environment consultant, I recommend positioning Backyard Carrot Growing Tubes in locations where they receive morning sun but are shielded from the harshest afternoon rays by taller structures or deciduous canopy. This placement maximizes photosynthesis while preventing the potting mix from drying out too rapidly. Furthermore, these tubes can be clad in natural materials like cedar or stone to match the surrounding hardscape, ensuring that the utility of the vegetable patch does not detract from the overall curb appeal of the property.
Landscape Design Principles
Effective landscape design is rooted in the concepts of symmetry and focal points. When installing Backyard Carrot Growing Tubes, avoid a scattered or haphazard arrangement. Instead, consider grouping them in clusters of three or five to create a rhythmic visual texture. Using varying heights for the tubes allows for a tiered elevation strategy, which draws the eye upward and adds dimension to otherwise flat garden beds. This creates a more dynamic environment and allows the designer to utilize height as a tool for visual balance. For example, taller tubes can be placed at the rear of a border, with shorter tubes in front, creating a cascading effect of greenery.
Proper irrigation planning is another pillar of a successful vertical garden layout. Because these tubes are isolated from the ground’s natural moisture reservoir, they require a dedicated drip irrigation system. Running 1/2-inch poly tubing along the base of the tubes and ascending with 1/4-inch micro-emitters ensures that water is delivered directly to the root zone without wastage. This approach prevents the erosion of the topsoil and maintains a clean, professional appearance. Additionally, walkways around these structures should be paved with permeable materials like decomposed granite or pea gravel to facilitate drainage and provide a stable surface for maintenance.
Plant and Material Selection
Selecting the right combination of plant varieties and construction materials is crucial for ensuring the longevity of your vertical system. The following table provides architectural recommendations for species that thrive in elevated tube environments.
| Plant Type | Sun Exposure | Soil Needs | Water Demand | Growth Speed | Maintenance Level |
| :— | :— | :— | :— | :— | :— |
| Nantes Carrot | Full Sun | Light Sandy Loam | Moderate | Medium | Low |
| Imperator Carrot| Full Sun | Deep Loose Silt | High | Slow | Medium |
| Chantenay Carrot| Partial/Full | Heavy Loam | Moderate | Fast | Low |
| Rosemary | Full Sun | Well-Drained | Low | Moderate | Low |
| French Marigold | Full Sun | Any | Moderate | Fast | Low |
| High-Density Poly| N/A | Support Fill | N/A | N/A | Minimal |
When choosing materials, 4-inch PVC pipe or BPA-free HDPE tubes are the industry standard for durability. For a more organic look, terracotta flue liners or weathered steel cylinders can be used. Each material affects the soil temperature differently; therefore, the choice of material should be dictated by the local climate. Steel may require internal insulation in desert environments, while plastic is ideal for cooler, temperate regions.
Implementation Strategy
The implementation of Backyard Carrot Growing Tubes begins with a comprehensive site grading plan. Ensure the area where the tubes will stand is level to prevent swaying or tipping. Start by excavating a shallow trench or clearing a flat pad and installing a geotextile weed barrier to prevent native weeds from encroaching on the structure. If the tubes are to be freestanding, a rot-resistant wooden frame or a retaining wall system should be constructed to provide lateral support.
For the tubes themselves, cut the material into lengths ranging from 24 inches to 36 inches. Use a power drill with a 1/4-inch bit to create drainage holes every six inches along the bottom third of the tube. Place a layer of 1-inch river rock at the bottom of each tube to facilitate moisture movement. Fill the remaining space with a custom blend of sphagnum peat moss, coarse sand, and perlite. This specific mixture prevents the compaction that often plagues standard garden soil. When planting, space seeds at 2-inch intervals to allow for maximum shoulder expansion of the roots. Finish the area with a 2-inch layer of cedar mulch around the base of the tubes to suppress weeds and retain ground moisture.
Common Landscaping Failures
The most frequent mistake in vertical carrot gardening is improper drainage. If the water cannot escape the bottom of the tube, the soil becomes anaerobic and the roots will rot. It is essential to ensure that the tubes sit on a porous surface such as a gravel bed rather than directly on heavy clay. Another common failure is root overcrowding. While it is tempting to maximize every inch of the Backyard Carrot Growing Tubes, failing to thin the seedlings will result in tangled, spindly carrots that lack nutritional density.
Soil compaction within the tube is another significant hurdle. Over time, gravity and watering cause the potting mix to settle and harden. To combat this, designers should incorporate high amounts of organic matter and avoid using native “dirt” which lacks the structural integrity for vertical containers. Finally, irrigation inefficiencies often lead to “dry pockets” where the top half of the tube is moist but the bottom half is bone dry. Using a pressure-compensating dripper ensures that water penetrates the full depth of the growing medium.
Seasonal Maintenance
Seasonal management is the key to maintaining a high-yield system year after year. During the spring, focus on cleaning the exterior of the tubes and checking for any structural damage caused by winter freeze-thaw cycles. This is also the time to refresh the top six inches of soil with worm castings or aged compost to provide a nutrient boost for the first planting of the year.
In the summer, the primary concern is moisture management and pest control. Utilize fine mesh netting to protect the carrot tops from the carrot rust fly. During the autumn, as temperatures drop, the sugars in the carrots will concentrate, improving flavor. This is the ideal time to harvest and then clear out any spent foliage. In the winter, if you live in a region with hard freezes, it is wise to wrap the tubes in burlap or move them to a sheltered location to prevent the material from cracking. If the tubes are permanent fixtures, simply cover the tops with heavy-duty plastic to prevent the soil from becoming waterlogged during the dormant season.
Professional Landscaping FAQ
What is the best height for carrot tubes?
A height of 30 inches is ideal for most varieties. This provides enough depth for the longest Imperator carrots while keeping the harvest at a comfortable, ergonomic height for the gardener, reducing the need for bending or kneeling during maintenance.
Can I reuse the soil in the tubes every year?
You should refresh the top third of the soil annually with compost and vermiculite. Every three years, it is best to completely replace the medium to prevent the buildup of pathogens and maintain the necessary air porosity for root expansion.
Do these tubes require special winter protection?
In USDA zones 6 or lower, the soil inside the tubes can freeze solid, potentially cracking the containers. Wrapping the tubes in bubble wrap or insulated blankets can help stabilize temperatures and protect both the structure and any overwintering crops.
What is the best way to hide the appearance of plastic pipes?
You can clad the pipes in cedar pickets, wrap them with natural willow screening, or paint them with UV-resistant matte paint in earthy tones. Surrounding the tubes with taller native grasses or perennial flowers also helps blend them into the landscape.
How do I prevent the soil from drying out too fast?
Mixing hydrostatic polymers or increased amounts of coconut coir into the soil blend helps retain moisture. Additionally, applying a thin layer of straw or shredded bark on the surface of the soil inside the tube will significantly reduce evaporation.