
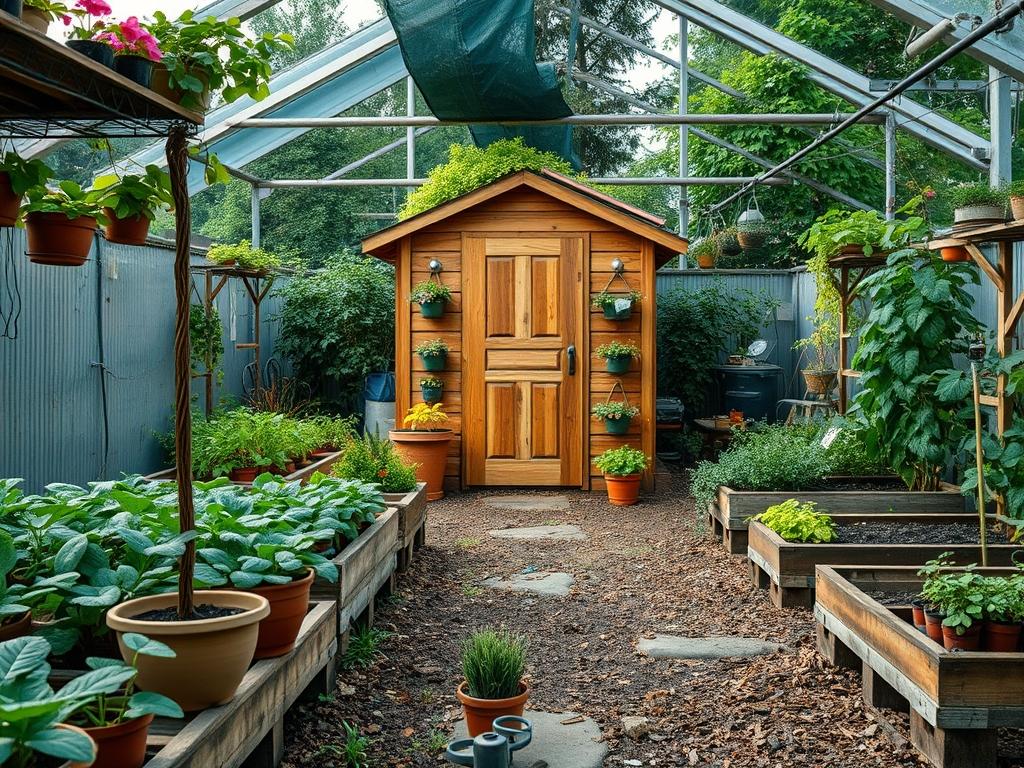
The traditional backyard shed often exists as a neglected utility, tucked into a distant corner or obscured by overgrown weeds. However, as an anchor of the outdoor environment, a well integrated structure serves as the pivot point between functional storage and high end landscape aesthetics. When approaching Backyard Tool Shed Upgrades, the primary challenge involves reconciling the utilitarian nature of the building with the biological needs of the surrounding garden. Climate considerations play a decisive role here. In regions with heavy precipitation, the shed must be elevated to prevent moisture wicking; in arid climates, the structure requires thermal buffering from strategic plantings. A thoughtfully executed landscape plan enhances the property value and significantly improves the daily workflow of the gardener. By treating the shed as a primary focal point rather than a hidden necessity, homeowners can create a cohesive transition that bridges the gap between the rigid lines of the home and the organic forms of the natural yard.
Landscape Design Principles
Effective landscape design for outbuildings relies on the mastery of visual balance and spatial organization. Symmetry does not necessarily mean creating a mirror image on either side of the shed door. Instead, it refers to the distribution of visual weight. If a large Oak tree stands to the left of the shed, a cluster of mid-sized shrubs or a heavy Stone Bench on the right can provide the necessary equilibrium. Focal points are equally crucial. A shed painted in a neutral slate or sage green can disappear into a backdrop of foliage, allowing a nearby Japanese Maple to command attention. Conversely, a shed with architectural windows and a custom Cedar door can become the centerpiece, framed by lower elevation layers.
Elevation layering is the process of arranging plants by height to create depth. Start with a ground cover or a Creeping Juniper at the very front. Follow this with a mid-layer of Lavender or Salvia, and finish with a backdrop of taller species like Emerald Green Arborvitae. This hierarchy masks the hard transition where the shed meets the soil. Furthermore, irrigation planning must be integrated early. Modern upgrades often include a Drip Irrigation System that winds behind the structure. This ensures that foundation plantings thrive without creating the excessive moisture that leads to wood rot. Finally, the walkway serves as more than just a path; it is the physical thread that connects the shed to the primary residence. Using a Natural Stone Path or Decomposed Granite provides a stable surface for a Wheelbarrow while reinforcing the stylistic theme of the backyard.
Plant and Material Selection
Choosing the right components for your shed surroundings requires a balance of hardiness and aesthetic appeal. The following table provides a selection of species specifically suited for foundation work and border definition.
| Plant Type | Sun Exposure | Soil Needs | Water Demand | Growth Speed | Maintenance Level |
| :— | :— | :— | :— | :— | :— |
| Boxwood | Full Sun to Part Shade | Well-drained, Neutral | Moderate | Slow | Low |
| Lavender | Full Sun | Sandy, Gritty, Dry | Low | Medium | Moderate |
| Hydrangea | Part Shade | Rich, Organic, Moist | High | Fast | Moderate |
| Creeping Juniper | Full Sun | Adaptable, Poor Soil | Low | Medium | Very Low |
| Hostas | Full Shade | Loamy, Consistent Moisture | Moderate | Fast | Low |
| Emerald Green Arborvitae | Full Sun | Moist, Well-drained | Moderate | Medium | Low |
Implementation Strategy
The actual execution of Backyard Tool Shed Upgrades begins with site preparation. Before any aesthetic changes take place, you must address the grading. The ground should slope away from the shed foundation at a rate of at least 1/4 inch per foot. This prevents water from pooling against the base, which is the most common cause of structural failure. Once the grade is established, use a Spade to cut clean edges for your planting beds. These edges should be at least 6 inches deep to prevent grass from creeping into the mulch areas.
Hardscaping comes next. If the shed sits on a concrete pad or gravel, consider extending that material outward to create a small landing area or apron. Pea Gravel or Crushed Limestone are excellent choices for this purpose. They provide a permeable surface that manages runoff effectively. Use a Steel Edging to contain the gravel and separate it from the garden soil. When it is time to plant, start with the largest specimens first. Dig holes two times the width of the root ball to encourage lateral growth. After the plants are in place, apply a layer of Hardwood Mulch at a depth of 3 inches. This mulch serves three purposes: it suppresses weeds, retains soil moisture, and provides a polished, professional look. Finally, install any necessary drainage solutions, such as a French Drain, if the shed is located at the bottom of a slope.
Common Landscaping Failures
The most frequent mistake in outbuilding landscaping is improper spacing. Homeowners often buy small plants at a nursery and place them tight against the shed walls. Within three years, those plants reach maturity, trapping humidity against the siding and obstructing access for maintenance. A minimum distance of 18 inches should be maintained between the structure and any mature foliage. Soil compaction is another silent killer. During the installation of a shed, heavy equipment often packs the earth so tightly that roots cannot penetrate and water cannot drain. Using a Tiller or a Broadfork to aerate the soil before planting is essential.
Irrigation inefficiencies also plague many DIY projects. Sprinkler heads that spray directly onto the wood siding will lead to paint failure and structural decay. A dedicated Drip Line is always preferable to overhead watering in these zones. Additionally, failing to consider the root systems of nearby trees can lead to foundation shifting. Species with aggressive roots, like certain Willows or Poplars, should be kept at a significant distance. Finally, many people ignore the “dark side” of the shed. The north-facing wall often becomes a muddy mess. Instead of trying to force grass to grow in total shade, utilize shade-tolerant organic materials like River Rock or Ferns to stabilize the soil.
Seasonal Maintenance
Maintaining a professional landscape requires a rhythmic approach to the calendar. In the spring, your focus should be on rejuvenation. Use a Rake to remove winter debris and refresh the Mulch layers. This is also the time to apply a slow-release fertilizer to your perennials and shrubs. Check the shed’s gutters and downspouts to ensure that spring rains are being channeled away from the foundation.
As summer arrives, the priority shifts to hydration. Monitor the Drip Irrigation System for leaks or clogged emitters. Prune back any aggressive growth that has begun to touch the shed’s exterior. In the autumn, the task is preparation. Clear fallen leaves from the base of the structure to prevent mold. It is also the ideal time to plant bulbs or move dormant shrubs. Finally, during the winter, take time to inspect the structure for any signs of pest intrusion or wood damage. If you live in a snowy climate, ensure that you do not pile snow against the shed walls when clearing paths, as the constant freeze-thaw cycle can damage the finish and the foundation.
Professional Landscaping FAQ
How do I prevent my tool shed from rotting at the base?
Ensure the ground slopes away from the structure. Use a base of Crushed Stone for drainage and keep all vegetation and Mulch at least 12 inches away from the siding to allow for proper airflow and drying.
What is the best material for a shed walkway?
Decomposed Granite or Flagstone are superior choices. They offer a stable, slip-resistant surface that can handle the weight of a Wheelbarrow or Lawn Mower while remaining permeable to prevent water runoff issues around the foundation.
Can I plant large trees near my backyard shed?
Avoid planting large trees closer than 15 feet from the structure. Large root systems can heave the foundation, while overhanging branches drop debris on the roof, leading to moisture retention, moss growth, and eventual shingle failure.
How can I hide an unattractive shed without removing it?
Install a Trellis on the most visible side and grow climbing plants like Clematis. Surround the base with a tiered arrangement of Boxwood and Tall Grasses to soften the sharp angles and integrate the building into the landscape.
How much mulch do I need around my shed garden?
Aim for a consistent depth of 3 inches. This thickness is sufficient to suppress weed growth and retain soil moisture without suffocating the root systems of your plants or creating a bridge for wood-destroying insects to reach the siding.