
An ecologically sound landscape requires a delicate balance between aesthetic perfection and environmental utility. While many homeowners prioritize vibrant floral displays and structured hardscaping, the integration of functional water sources remains a frequently overlooked component of a high performing garden. Backyard Pollinator Waterers are not merely basins of water; they are critical infrastructure components that support the local insect population, improve the health of nearby flora, and add a layer of sophisticated environmental stewardship to a property. In regions prone to heatwaves or inconsistent rainfall, these stations provide a reliable hydration point that prevents heat stress in beneficial insects. This ensures the continued pollination of ornamental and edible plants alike. By viewing these waterers through the lens of landscape architecture, we can shift them from utilitarian afterthoughts to integrated design elements that enhance the overall curb appeal and biological health of the estate.
Landscape Design Principles
Integrating Backyard Pollinator Waterers into a professional landscape plan requires an understanding of symmetry and focal points. A well placed waterer acts as a secondary focal point that draws the eye toward specific garden beds or transitions between hardscaping and softscaping. For formal landscapes, consider a symmetrical layout where a central pedestal basin is flanked by structured shrubs. This provides a sense of order while inviting movement into the space. In more naturalistic or cottage style gardens, the waterer should follow the principle of elevation layers. Placing a saucer at a lower elevation near ground cover, while hosting another on a retaining wall, creates a multi story habitat that serves different species of pollinators.
Visual balance is achieved by matching the material of the waterer to the surrounding environment. If your home features modern architecture with clean lines, a granite basin or a sleek ceramic bowl maintains the design language. For rustic environments, a weathered stone vessel or a copper dish that will develop a patina over time is more appropriate. Beyond aesthetics, the principle of irrigation planning is vital. Placing waterers near existing drip irrigation lines allows for easier refilling and ensures the surrounding soil remains moist, which helps regulate the local microclimate. Walkways should be designed to lead visitors near these features without encroaching on the insects’ flight paths. This provides an opportunity for observation while maintaining the site functionality.
Plant and Material Selection
The following table outlines plants that complement Backyard Pollinator Waterers by providing nectar sources and nearby shelter.
| Plant Type | Sun Exposure | Soil Needs | Water Demand | Growth Speed | Maintenance Level |
| :— | :— | :— | :— | :— | :— |
| Lavandula angustifolia | Full Sun | Well Drained | Low | Moderate | Low |
| Echinacea purpurea | Full Sun | Loamy/Dry | Moderate | Fast | Low |
| Monarda fistulosa | Partial Shade | Moist/Rich | High | Fast | Moderate |
| Salvia nemorosa | Full Sun | Average | Low | Moderate | Low |
| Asclepias tuberosa | Full Sun | Sandy | Low | Slow | Low |
| Buddleja davidii | Full Sun | Any | Moderate | Rapid | Moderate |
When selecting materials for the waterer construction, focus on texture and safety. River rocks, glass marbles, and coarse sand are essential components. These materials offer landing zones so insects can drink without the risk of drowning. Avoid using treated wood or plastics that may leach chemicals into the water source.
Implementation Strategy
The building process for Backyard Pollinator Waterers begins with site analysis and grading. Select a location that receives partial shade during the hottest part of the afternoon. This prevents the water from evaporating too quickly or reaching temperatures that could harm small organisms. Once a location is chosen, ensure the ground is level. You may need to use a hand level and a small amount of paver sand to create a stable base. This prevents the basin from tipping and ensures the water depth is consistent across the vessel.
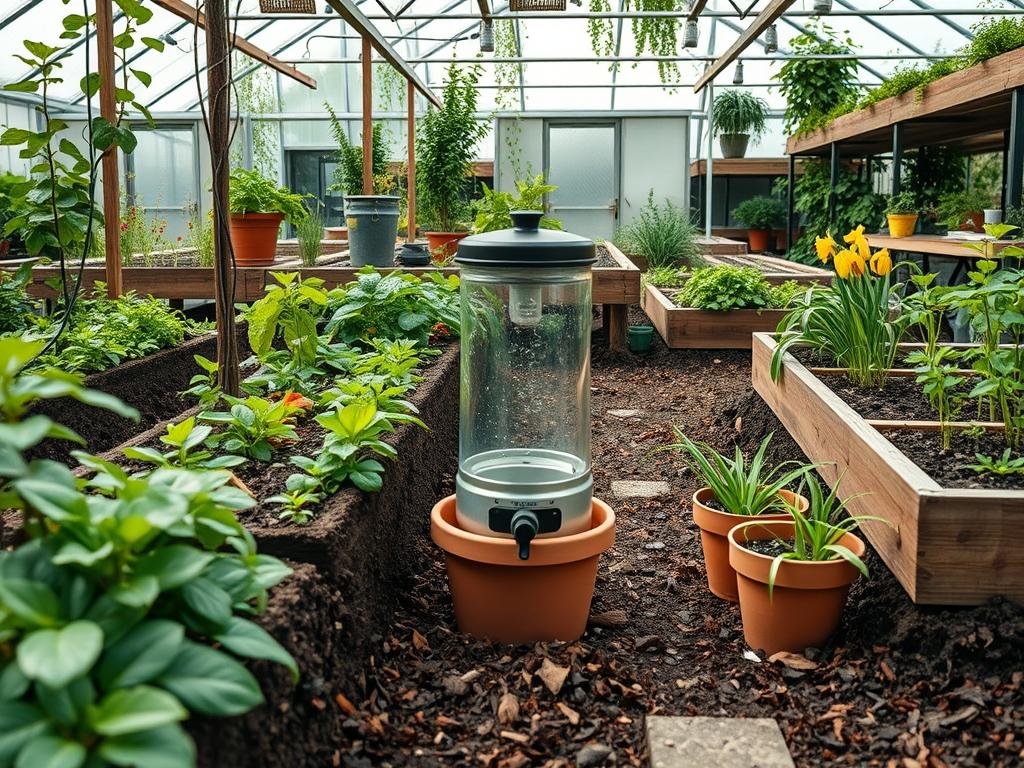
To build a standard basin waterer, select a shallow ceramic or stone dish with a depth no greater than 2 inches. Fill the bottom of the dish with a layer of clean gravel or river stones. The stones should break the surface of the water, providing dry islands for bees and butterflies to land on. For a more advanced setup, integrate a solar powered submersible pump to keep the water moving. Moving water prevents mosquito larvae from developing and creates a soft sound that enhances the outdoor living experience.
Edging should be considered around the base of the waterer to prevent mulch from washing into the basin during heavy rain. Use steel edging or natural stone borders to define the space. If the waterer is placed within a garden bed, ensure the mulch depth is maintained at 3 inches to retain soil moisture while providing a clean perimeter. Proper drainage is also necessary; the area surrounding the waterer should be slightly sloped away from the foundation of the home to prevent water pooling.
Common Landscaping Failures
One of the most frequent mistakes in backyard planning is the creation of stagnant environments. A waterer that is not cleaned or refilled regularly becomes a breeding ground for pathogens. Improper drainage is another significant failure. If the area surrounding a waterer is not graded correctly, overflow can lead to soil compaction and root rot for nearby plants. Furthermore, placing waterers too far away from nectar sources forces pollinators to expend unnecessary energy. The waterer should be within 10 feet of high traffic flowering plants to be truly effective.
Root overcrowding often occurs when homeowners plant large, thirstier species too close to a delicate water feature. As the root systems expand, they can heave paver stones or tilt the waterer, ruining the level surface you worked to create. Additionally, irrigation inefficiencies, such as allowing a sprinkler head to blast directly into a shallow pollinator dish, will wash away the landing stones and potentially drown the insects you are trying to protect. Proper spacing and a clear understanding of the mature size of your plant selections will mitigate these common issues.
Seasonal Maintenance
Landscape management is a year round commitment that changes with the telescope of the seasons. In the spring, the primary goal is cleaning and reactivation. Remove any organic debris like fallen leaves or twigs from the basin. Scrub the stones with a stiff brush and a solution of one part vinegar to nine parts water to remove algae buildup. This is also the time to check your irrigation lines for leaks and ensure the grading has not shifted during the winter freeze thaw cycles.
Summer maintenance focuses on evaporation control and hygiene. During peak heat, verify water levels daily. Use a watering can to top off the basins and keep the landing stones accessible. In autumn, as deciduous trees begin to shed, you may need to move waterers away from heavy overhanging branches to prevent the water from becoming clogged with leaf litter. This is an excellent time to refresh the mulch around the base of the waterer and prune any encroaching perennials.
During the winter, if you live in a climate where the ground freezes, it is often best to drain and store ceramic or glass waterers to prevent cracking. However, if you choose to keep them active for year round residents, use a floating de icer or a low wattage heater. Ensure that the materials can withstand thermal expansion. Professional landscape architects often suggest swapping delicate summer basins for heavy concrete troughs or cast iron vessels during the colder months to maintain the structural integrity of the garden.
Professional Landscaping FAQ
Where is the best place to put a waterer?
Place waterers in a location that receives morning sun and afternoon shade, ideally near nectar rich flowers. Ensure the spot is protected from high winds and is at a safe elevation of at least 12 inches to deter ground predators.
How often should I change the water?
To prevent disease and mosquito breeding, change the water every 2 to 3 days. If the waterer includes a pump for circulation, you may extend this, but you should still perform a deep clean every two weeks using a soft brush.
What type of stones should I use?
Use natural river rocks, lava rocks, or unglazed ceramic pebbles. These materials provide excellent traction for insects. Avoid using polished stones or chemically treated decorative glass that might be too slippery for a bee to gain a secure foothold.
Do I need an automated refill system?
While not mandatory, integrating a 1/4 inch drip line into your existing irrigation system ensures the waterer never runs dry. This consistency is vital for establishing a reliable habitat, especially during the extreme heat of mid summer months.
Can I put a waterer on a wood deck?
Yes, but you must ensure the basin is leak proof. Use a protective tray or a stone plinth beneath the waterer to prevent moisture from damaging the wood. This also adds a decorative layer that complements the deck material.