
Integrating a productive raspberry patch into a modern backyard requires a shift in perspective from traditional row farming to intentional landscape architecture. While most homeowners view berry bushes as purely utilitarian, a senior landscape consultant sees them as structural assets that provide verticality, texture, and seasonal interest. Successfully establishing a patch involves more than just digging a hole; it requires a sophisticated understanding of drainage, spatial dynamics, and site orientation to ensure the garden remains an aesthetic highlight rather than an overgrown eyesore. The primary challenge lies in the sprawling nature of the plant. Without a structured enclosure and a rigorous maintenance plan, the vigorous root systems can quickly encroach upon turf or ornamental beds, disrupting the visual harmony of the outdoor environment.
By focusing on Backyard Raspberry Patch Tips through the lens of environmental design, we can transform a simple fruit garden into a sophisticated outdoor feature. We must consider the site topography and how the 1,200-square-foot or smaller backyard can accommodate both human traffic and plant health. This involves analyzing light patterns throughout the day and ensuring that the selected site receives at least six to eight hours of direct sunlight. Furthermore, the integration of hardscaping elements, such as retaining walls or raised masonry beds, provides the necessary containment to prevent the patch from becoming a maintenance burden. When planned correctly, these brambles serve as a living screen, offering privacy while producing a high-value harvest that traditional privacy hedges simply cannot match.
Landscape Design Principles
Applying architectural principles to a raspberry patch ensures that the installation complements the existing home environment. Symmetry is a vital consideration; placing twin raspberry beds on either side of a central axis, such as a garden path or a focal water feature, creates a sense of formal balance. For more informal landscapes, clustering different varieties in staggered elevation layers allows for a more natural look. In this scenario, the taller, upright Floricane-bearing varieties serve as the back layer, while shorter, mounded cultivars occupy the mid-ground.
The use of focal points is another essential strategy. A well-constructed T-post trellis system, made from Cedar or powder-coated steel, can act as a sculptural element during the winter months when the canes are dormant. By carefully selecting materials that match the home’s exterior trim or decking, the patch feels like a deliberate extension of the living space. Irrigation planning should also be invisible; subterranean drip irrigation lines buried beneath 3 inches of organic mulch provide the necessary hydration without the aesthetic clutter of hoses and sprinklers. This approach also prevents leaf-born diseases by delivering water directly to the root zone, keeping the foliage dry and vibrant.
Visual balance is further achieved through the use of walkways. Using a 2-foot wide gravel path or stepping stones around the perimeter of the patch allows for easy access during harvest without compacting the soil. This structural boundary also serves as a “root barrier,” especially if a 12-inch deep plastic edge is installed beneath the path to thwart subterranean runners. By treating the patch as a framed gallery piece rather than a wild thicket, the landscape architect ensures that the garden remains manageable and high-yielding for years to come.
Plant and Material Selection
| Plant Type | Sun Exposure | Soil Needs | Water Demand | Growth Speed | Maintenance Level |
| :— | :— | :— | :— | :— | :— |
| Heritage Red | Full Sun | Well-drained Loam | High during fruiting | Fast | Moderate |
| Latham Red | Full Sun | Targeted Ph 6.0 | Medium | Moderate | Low (Hardy) |
| Fall Gold | Full/Partial Sun | Humus-rich soil | High | Medium | Moderate |
| Bristol Black | Full Sun | Fertile, sandy loam | Moderate | Very Fast | High (Pruning req.) |
| Jewel Black | Full Sun | Deep, loose soil | Moderate | Fast | High (Disease watch) |
Implementation Strategy
The foundational step in any raspberry installation is professional-grade site preparation. Start with a comprehensive soil test to determine the nutrient profile and pH level. Raspberries thrive in slightly acidic environments, ideally between 6.0 and 6.5 pH. If the soil is heavy clay, the landscape architect will specify the addition of compost, peat moss, and perlite to improve aeration and drainage. Grading the site to a 2% slope away from the root zone is crucial to prevent “wet feet,” which is the leading cause of root rot in backyard patches.
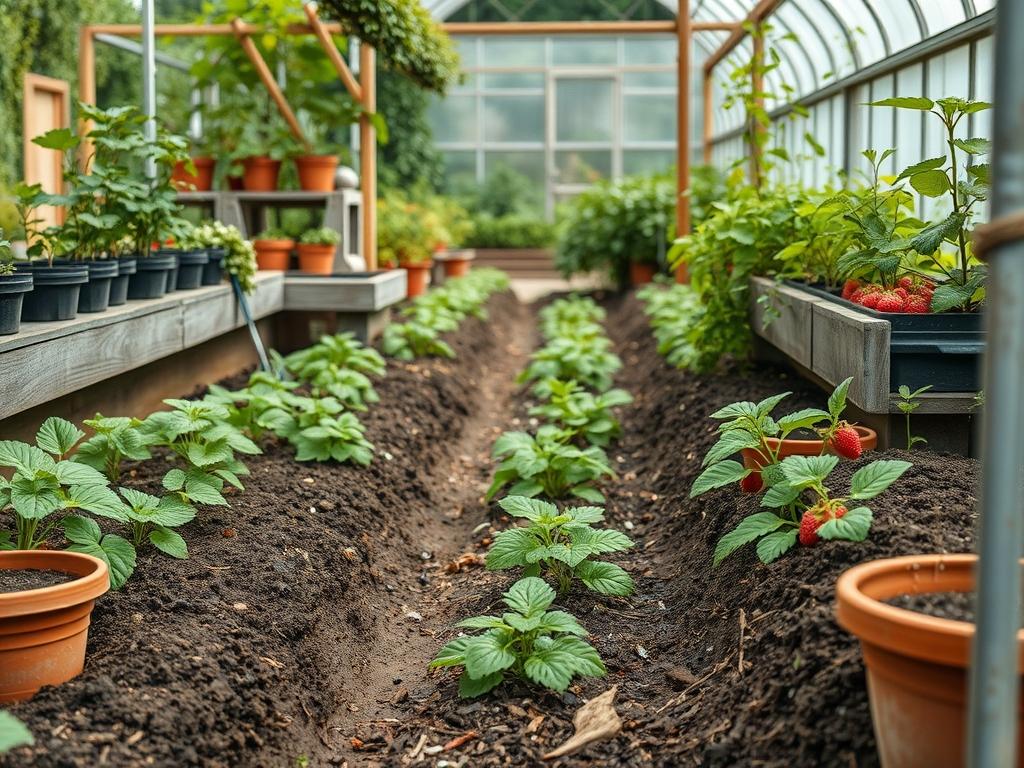
Once the soil is prepared, the layout of the trellis system begins. For a high-yield backyard patch, use 8-foot cedar posts buried 2 feet into the ground. Space these posts 10 feet apart and string 12-gauge galvanized wire at heights of 3 feet and 5 feet. This creates a stable framework that supports the weight of the fruit and keeps the canes upright for better airflow. Effective edging is the next priority. Use heavy-duty metal edging or a concrete curb to define the boundaries of the patch clearly.
When planting, ensure a spacing of 2 feet between individual plants and 8 feet between rows. This allows for the “V-trellis” method, where canes are fanned out to the sides, maximizing sun exposure to the center of the plant. After the canes are set, apply a 4-inch layer of wood chips or shredded bark. This mulch depth regulates soil temperature, suppresses weeds, and preserves moisture. For a professional finish, install a smart irrigation controller linked to a weather sensor, ensuring the patch receives exactly 1 inch of water per week based on local rainfall data.
Common Landscaping Failures
The most frequent mistake in backyard berry planning is neglecting the drainage profile. Raspberries are highly susceptible to Phytophthora root rot; even a few days of standing water can decimate an established patch. Homeowners often plant in low-lying areas of the yard without considering how runoff from the roof or patio will impact the soil saturation. To correct this, professionals often recommend raised garden beds built to a height of 12 to 18 inches to ensure gravity-fed drainage regardless of the native soil quality.
Another failure is root overcrowding and improper spacing. While it is tempting to plant densely for an immediate “full” look, raspberries are aggressive spreaders. Without a 12-inch deep root barrier, the patch will quickly lose its architectural integrity as runners pop up in the middle of the lawn. Furthermore, lack of airflow due to dense planting leads to fungal outbreaks like powdery mildew or gray mold. Professional designs always prioritize air circulation, ensuring that every cane has enough room to breathe and dry out after morning dew. Finally, the use of overhead sprinklers is a common technical error; the resulting moisture on the fruit leads to rapid degradation and rot before the harvest can even begin.
Seasonal Maintenance
Maintaining the structural integrity of a raspberry patch requires a four-season management plan. In the spring, apply a balanced 10-10-10 fertilizer just as new growth appears. This is also the time to inspect the trellis wires for tension and adjust as needed. As the canes begin to grow, use twine to train them toward the wires, ensuring the center of the plant remains open to the light.
During the summer month, the focus shifts to moisture management and harvest. Check the drip emitters regularly to ensure no clogs are preventing water flow. Once the harvest concludes for summer-bearing varieties, prune out the “spent” canes at ground level using sharp bypass pruners. These canes will be brown and woody, whereas the new green canes should be left to produce next year’s crop.
In autumn, clear away any fallen leaves or debris to prevent pests like cane borers from overwintering in the patch. For ever-bearing varieties, a late-season harvest may occur, after which the canes can be topped to a height of 4 feet to prevent wind damage during winter storms. Winter maintenance involves heavy pruning. For many growers, the easiest method is to mow the entire patch down to 2 inches above the soil in late January, though this is only recommended for specific varieties like Heritage. Applying a fresh layer of organic mulch in late winter protects the crown from the freeze-thaw cycle of early spring.
Professional Landscaping FAQ
How much space do I need for a productive patch?
A functional patch requires at least 3 feet by 10 feet. This provides enough room for a single row of five plants, yielding approximately 10 to 15 pounds of fruit annually while allowing for proper trellis installation and maintenance access.
Can I grow raspberries in large containers?
Yes, but you must use at least 15-gallon pots with excellent drainage. Select “dwarf” varieties like Raspberry Shortcake. Ensure the containers are placed on pot feet to prevent staining the patio and to allow for maximum drainage.
Which mulch is best for a residential berry patch?
Use arborist wood chips or pine bark nuggets. These materials break down slowly, provide excellent insulation, and maintain the slightly acidic soil profile that raspberries prefer. Avoid using grass clippings, as they may contain herbicides that damage the canes.
Do I need a male and female plant for fruit?
No, raspberries are self-fertile. A single plant can produce fruit without a pollinator. However, attracting bees with nearby native wildflowers like Lavender or Coneflower will significantly increase your fruit set and the overall size of the berries.
How do I stop raspberries from taking over my lawn?
Install a 12-gauge plastic root barrier or a concrete edge to a depth of at least 12 inches. Regularly use a spade or edger to slice the soil at the boundary, which severs any adventurous runners before they establish.